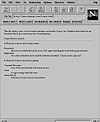
FIG. 32.8 A custom list displayed in Netscape.
| Previous | Table of Contents | Next |
Combining Lists
As you can see, the various lists in HTML give you several ways to present information to a user. In fact, HTML allows you to combine list types to gain even more control over how your information is presented. You can nest one list type within another easily.
Suppose that you want to create a section of your home page to tell users your favorite movies and music. You can nest two glossary lists within an unordered list to create a detailed outline. Listing 32.7 shows an example HTML source that uses nested lists.
Listing 32.7 Creating a Custom List by Nesting Different List Types
<HTML>

<HEAD>

<TITLE>A Custom List</TITLE>

</HEAD>

<BODY>

This list shows some of my favorite musicians and movies.

It uses two definition lists nested in an unordered list.

It also uses some text formatting tags.<P>

I hope that you enjoy it.<HR>

<LI>Here are some of my favorite movies<P>

 <DL>

 <DT>

 <DD>

 <DT>

 <DD>

 </DL>

<P>

<LI>Here are some of my favorite musical groups<P>

 <DL>

 <DT>Coil

 <DD>A European experimental and electronic project.

 <DT>Philip Glass

 <DD>An incredible modern composer.

 <DT>Ozone Quartet

 <DD>Instrumental progressive quartet.

</DL>

</UL>

</BODY>

</HTML>
This combination list example is a bit more complicated than the others you’ve seen, but it still uses only techniques covered so far in this chapter. Notice that the glossary lists are indented in the HTML source code. The indent is used only to make the source code easier to read (recall that Web browsers ignore line breaks and extra spaces when they display the page). Figure 32.8 shows a custom list displayed in Netscape.

FIG. 32.8 A custom list displayed in Netscape.
As a quick review, Table 32.2 shows the HTML tags for creating lists we’ve gone over.
| Tag | Action |
|---|---|
| <UL>…</UL> | Create an unordered (bulleted) list; list items begin with the <LI> tag |
| <OL>…</OL> | Create an ordered (numbered) list; list items begin with the <LI> tag |
| <DL>…</DL> | Create a definition list; list items begin with a <DT> tag for a definition term or a <DD> tag for a definition |
Now comes the neat stuff. In this section, you learn how to hook multiple Web pages together and create hypertext links that jump from place to place.
Hypertext links in HTML are known as anchors, and the <A> and </A> tags are used to define an anchor. These tags are placed around the words you want to use for the hypertext link. Web browsers typically underline hypertext links automatically and show them in a different color.
To tell the Web browser which document to retrieve when the hypertext link is clicked, you use the HREF attribute and an URL with the anchor tag. Suppose that you want to create a hypertext link to the NCSA Mosaic home page. If you want to include the sentence Click here to go to the NCSA Mosaic home page., where the word here is the hypertext link, you need the following HTML lines:
Click <A HREF=“http://www.ncsa.uiuc.edu/SDG/Software/Mosaic/index.html”>

here</A> to go to the NCSA Mosaic home page.
The anchor tags surround the hypertext link—in this case, the word here. The HREF attribute is inserted inside the opening anchor tag. That’s all there is to it.
NOTE: You can place any URL in the HREF attribute. You can link to a Web page, an FTP site, a Gopher server, or any other location.
In addition to just creating hypertext links, you can also give names to links by using the NAME attribute. Named links are very useful for jumping to specific locations in a document. You can list a table of contents at the beginning of a long document and have each entry in the table of contents be a hypertext link to the appropriate place in the document. By combining them with an HREF, you can send users to a specific location in another document.
Assume that you have a long document—maybe a Frequently Asked Questions (FAQ) list that discusses widgets. You can create a hypertext link from the table of contents to the “How to Use Widgets” section. The first thing you need to do is to create a named anchor in the “How to Use Widgets” section, so that you can jump to it from the table of contents. The HTML to do this looks like the following:
<A NAME=“howtouse”>How to Use Widgets</A>

Widgets are a very powerful tool if used properly.

Unfortunately, no one knows enough about them to use

them properly. Since they have no relevance to HTML, you

don’t need to discuss them further in this chapter.
Now, all you need to do is to put a hypertext link from the table of contents to this spot. To do that, you use the HREF attribute to link to this anchor, and give the anchor’s name preceded by a # character. The table of contents entry looks like this:
<A HREF=“#howtouse”>How to Use Widgets</A>
When someone clicks the entry How to Use Widgets in the table of contents, the browser jumps to the anchor named howtouse later in the document.
NOTE: You can name an anchor that’s a hypertext link to another location. Just use the NAME and HREF attributes in the same anchor. For example,
- <A HREF=“http://www.doesnotexist.com/index.html#end”>Go to the end</A>
would take you to another document. It also would display the file starting from wherever the <#end> anchor is located in that file.
| Previous | Table of Contents | Next |