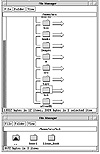
Figure 3.5 The X file manager in action.
| Previous | Table of Contents | Next |
By now, you should have X up and running. Even so, with only a window manager and a few shell windows (xterms), you haven’t seen much at all about what X can do for you and how to configure X more to your liking.
Depending on your preferences, there are different programs you may want to set up in your X environment. If you’re new to UNIX, you may want to run a file manager program such as xfm, as shown in Figure 3.5.

Figure 3.5 The X file manager in action.
If you’re more familiar with UNIX, you’ll probably want to run a number of shell windows with the program called xterm. xterm presents a UNIX shell in a window but allows you to specify the number of lines, the fonts, and the colors used. You can also copy and paste between xterm windows, a handy feat with long, complicated UNIX command lines. (See the section on xterm later for more on this handy application.)
The xterm program is probably the most popular X program. It seems kind of funny to run a shell window program, which is what xterm is, in a fancy graphical environment. But we’re still running X on top of Linux and we still need access to the UNIX environment.
Figure 3.6 shows xterm.

Figure 3.6 The xterm program.
The neatest things about xterm are that you can:
Even though it’s called xterm, the program isn’t really a terminal emulator; it provides you with a UNIX shell window.
The simplest way to control the size of an xterm window is through the -geometry command-line parameter:
gilbert:/$ xterm -geometry WidthxHeight &
With this parameter, the Width is the number of characters wide, almost always 80, and the Height is the number of lines to use. We find that 40 is a good number (the default is 24 lines).
Just about every X program supports the -geometry command-line parameter, but virtually every X program treats the -geometry command-line parameter differently from xterm (xterm is the main exception, in other words). While you specify the width and height in terms of characters with xterm, just about every other X program treats the -geometry as the size in pixels. This is important to note if you create some really small windows.
For example, the command to start xterm with 80 columns (the default) and 40 lines is:
$ xterm -geometry 80x40 &
With the -geometry command-line parameter you can also specify the starting location in pixels. The full syntax is:
-geometry WidthxHeight+X+Y
In this case, X and Y specify the location of the upper-left corner of the program’s window in pixels. In X, the origin is also in the upper-left corner of the screen, so the following command creates an xterm window offset 10 pixels (in both X and Y) from the upper-left corner:
gilbert:/$ xterm -geometry 80x40+10+10 &
You can skip the size (width and height) or the location (x and y). The following are all valid commands:
  gilbert:/$ xterm -geometry 80x40 &

  gilbert:/$ xterm -geometry +10+10 &

  gilbert:/$ xterm &
Setting Up a Scrollbar for Xterm
By default, xterm does not provide for a scrollbar, although one is available. You can use the -sb command-line parameter:
gilbert:/$ xterm -sb &
This creates a scrollbar in the xterm window (usually on the left side).
The xterm scrollbar is kind of tricky. Use the middle mouse button to move to the position you want. The right mouse button (assuming you have a three-button mouse) moves back, while the left mouse button moves forward. We almost always just use the middle mouse button.
In addition to the -sb command-line parameter, you can request a scrollbar for xterm in an X resource file.
| Previous | Table of Contents | Next |