| Previous | Table of Contents | Next |
Windows
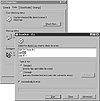
You can check Windows 9x resources by using the System Resource Meter, and you can check hardware limits by using the System Monitor. Both of these programs can be installed from the Control Panel (see Figure 8.2). Here are the steps involved:
- 1. Choose Start|Settings|Control Panel.
- 2. Choose Add/Remove Programs from the Control Panel window.
- 3. Click the Windows Setup tab.
- 4. Check the Accessories option (if you’re using Windows 98, click System Tools).
- 5. Click Details.
- 6. Click the System Monitor and System Resource Meter options.
- 7. Click OK.
- 8. Insert the Windows CD-ROM when prompted. (Some systems have the Windows setup files installed on the hard drive, so you might not have to perform this step.)
- 9. Run the tools by using the Accessories|System Tools menu. (No rebooting required.)
- 2. Choose Add/Remove Programs from the Control Panel window.

Figure 8.2 Adding System Resource Meter and System Monitor to Windows 9x.
System Resource Meter
You can use System Resource Meter to make sure a given workstation isn’t running out of resources. It’s particularly effective to run System Resource Meter, try something that you’re having trouble with, and watch the bar graph change. You might see it go into the yellow or red, which would indicate resource issues—this might mean you need to add memory, use a less resource-intensive application, or run fewer applications simultaneously.
For example, let’s say that you’re having trouble printing from WordPerfect—nothing terrible, except that your printed output doesn’t look the way it should. You’re printing a rather complex newsletter and suspect that you might be running out of gas on your workstation. You run the System Resource Meter and see a new icon appear on your system tray. Because the icon is not green, you suspect that you’re running out of Windows system resources. To verify that this is your problem, do the following:
- 1. Exit all other programs but WordPerfect.
- 2. Watch the meter go into the green.
- 3. Try to print again.
- 2. Watch the meter go into the green.
System Monitor
System Monitor can monitor just about anything—in Figure 8.3 it’s running alongside System Resource Meter to monitor free memory and how hard the CPU is working. System Monitor is configurable for bar graph or line chart operation, and it can display many different resources and statistics. You’ll use System Monitor again to check network throughput in Hour 11, “Windows Networking Basics.”

Figure 8.3 With System Monitor, you can observe how hard your CPU is working and how much memory you have available, among other vital PC statistics.
Let’s say that your computer is running slowly. You wonder whether you’re running out of memory, so you do the following:
- 1. Fire up System Monitor.
- 2. Select Edit|Add Item and choose Free Memory from the Memory Manager category (to keep track of the free physical memory).
If, in fact, you have approximately 9.1MB of free physical memory, as shown in Figure 8.3, this is not why your machine is running slowly. This amount of memory isn’t a lot—but it’s probably enough that you’re not swapping. If the peak value (the dot to the right of the line) is more like .8MB or 1MB, you’re probably running out of memory and causing swaps. You could verify this by adding a bar to the graph—Swapfile in Use (again from the Memory Manager category)—and seeing how large this is. If it’s more than a couple of megabytes, it’s definitely indicating that swapping is occurring. In this case, you should think about getting a memory upgrade or losing a couple of desktop toys.
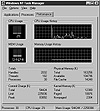
Windows NT has a very easily accessible CPU and RAM monitor that’s built into the Task Manager dialog box (see Figure 8.4). To open this dialog box, press Ctrl+Alt+Delete and choose Task Manager.

Figure 8.4 The NT Task Manager’s Performance Monitor is a good way to get a quick and succinct status of an NT workstation.
ScanDisk
The hard drive is probably the most fragile resource of your system. It’s a good idea once you rule in a workstation to run ScanDisk on the hard drive to rule out hard drive errors. This is particularly true if you’re using the first release of Windows 95—it does not run ScanDisk after an abnormal shutdown the way later releases of Windows 9x do! This can mean that days and weeks of disk problems due to power blips and user resets can go unnoticed. These errors, along with wear and tear on the drive, can accumulate and cause truly strange problems.
It’s a really, really good idea to run ScanDisk on a regular basis—say, every week. Most weeks you can probably get away with the Standard check, but every so often (every month or so), you’ll probably want to run the Thorough check, just to be safe.
Although you can run ScanDisk from the Programs|Accessories|System Tools menu, you can also run it by right-clicking your hard drive in Explorer and then selecting Properties from the shortcut menu that appears. You’ll see a dialog box with a Tools tab, like the one shown in Figure 8.5. On this tab, you can see when you last checked the drive. You can also start a new check from here as well.

Figure 8.5 A ScanDisk a day (or week, as the case may be) keeps the trouble away!
Doesn’t Do Windows
Not a Windows user? Fret not. UNIX and NetWare were resource checking when Windows was just a glimmer in Bill Gates’s eye. Although the methods differ—and aren’t as graphical, unless you’re using X Window or NetWare 5—the basic idea remains the same: Check your resources when you’re having problems and compare these results to what your resources look like when you’re not having problems.
| Previous | Table of Contents | Next |