Figure 24.2. When you issue a gs command Ghostscript displays status messages.
| Previous | Table of Contents | Next |
The primary program in the Ghostscript set is gs, which is the Ghostscript interpreter. The gs utility reads in any files you tell it to and interprets them for you, displaying a properly formatted document in an X window. Running gs from a character terminal doesn’t accomplish much since a graphics window is required to show the results of its operation.
To display one or more files in X windows with Ghostscript, issue the following command, where file1.ps is the filename (with .ps extension, usually, to show it’s a PostScript format file):
gs file1.ps …
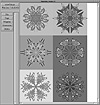
You can specify more than one filename, and each file is displayed in sequence. When you issue the gs command you’ll see a message such as “Initializing…” and a bunch of messages from the Ghostscript interpreter, and then a window will open with the contents of the file displayed. The exact messages and appearance of the X window differ depending on your version of Ghostscript. Figure 24.2 shows the output in an Xterm when you issue the gs command, and Figure 24.3 shows the window that Ghostscript displays with the contents of the selected file formatted properly.

Figure 24.2. When you issue a gs command Ghostscript displays status messages.

Figure 24.3. Ghostscript displays PostScript files in a window for you to view directly.
If you want to suppress all the messages Ghostscript generates (shown in Figure 24.2), use the -q (quiet) option, which suppresses all but major messages.
You can get help about the gs command through the man pages, which are often difficult to read, or from the command line by using either the -h or the -? option. When you use either option (both display the same screen output) you will see all the available options and command usage for the gs command. Since the output of the help screens take up more than one page, you should pipe the output to the more command, like this:
gs -h | more
You’ll see a screen like that in Figure 24.4. To move to the next page of help, press the space key. To quit the more utility, use the q command or Ctrl+C.

Figure 24.4. Using the more command to display the help screen for the gs command.
Configuring Ghostscript for X
Some versions of Linux come with the X system premodified to handle Ghostscript output, but most do not. Ghostscript uses a set of X resources that are usually stored under the program name ghostscript and class name Ghostscript in the .Xdefaults file. Your .Xdefaults file should have three entries at a minimum in it, like this:
| Ghostscript*geometry: | -0+0 |
| Ghostscript*xResolution: | 72 |
| Ghostscript*yResolution: | 72 |
If these entries are missing from your .Xdefaults file, enter them using an editor and reload the defaults either by restarting the server or by issuing the following command, assuming you are in your home directory:
xrdb -merge ./.Xdefaults
If not, specify the path to your .Xdefaults file.
Ghostscript can make use of a number of resources in the .Xdefaults file, although most are of little use to you since defaults work just fine. The resources you can set in Ghostscript are shown in Table 24.1.
| Resource name | Class of resource | Default value |
|---|---|---|
| background | Background | white |
| foreground | Foreground | black |
| borderColor | BorderColor | black |
| borderWidth | BorderWidth | 1 |
| geometry | Geometry | NULL |
| xResolution | Resolution | calculated |
| yResolution | Resolution | calculated |
| useExternalFonts | UseExternalFonts | true |
| useScalableFonts | UseScalableFonts | true |
| logExternalFonts | LogExternalFonts | false |
| externalFontTolerance | ExternalFontTolerance | 10.0 |
| palette | Palette | Color |
| maxGrayRamp | MaxGrayRamp | 128 |
| maxRGBRamp | MaxRGBRamp | 5 |
| useBackingPixmap | UseBackingPixmap | true |
| useXPutImage | UseXPutImage | true |
| useXSetTile | UseXSetTile | true |
| regularFonts | RegularFonts | none |
| symbolFonts | SymbolFonts | none |
| dingbatFonts | DingbatFonts | none |
| Previous | Table of Contents | Next |